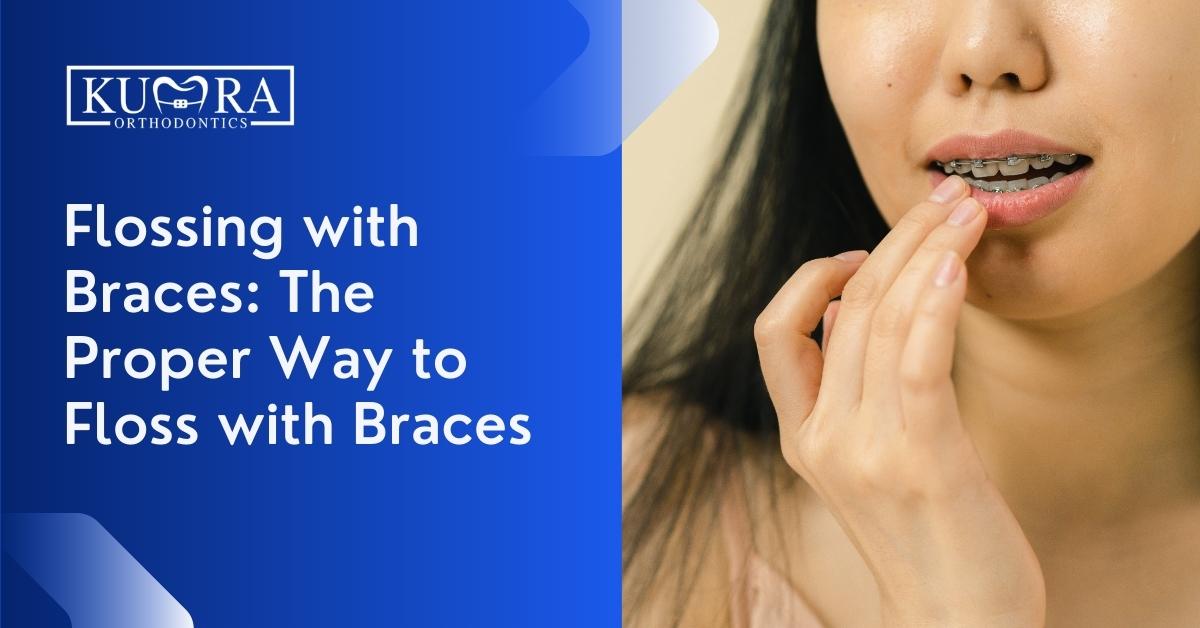
Flossing with braces can be a tricky task, but it is not impossible.
Flossing, or cleaning between teeth with a wax-coated thread, scrapes the hard-to-reach areas that brushes frequently miss, especially when brackets and wires of the braces are present. Floss between each tooth once a day, then clean around the brackets and under the wires with a little interproximal brush.
Importance of Flossing
The American Dental Association recommends that you clean between your teeth daily with an interdental cleaner (like floss). Cleaning the spaces between your teeth might aid in cavity and gum disease prevention. Cleaning the spaces between your teeth aids in the removal of a sticky coating called plaque.
Plaque is formed by bacteria that feed on leftover food or sugar in your mouth. This results in the production of corrosive acid, which can eat away at the outer coating of your teeth, producing cavities.
Without proper brushing and flossing, plaque can eventually solidify into a gritty material called tartar (or calculus). Tartar builds up along the gum line, resulting in gum disease. Tartar can only be removed by your dentist once it has formed.
It can freshen your breath.
Keep your self-confidence alive by flossing away any trapped food particles in your mouth that create a foul odor. Keep a comprehensive dental care regimen, and you’ll enjoy fresh breath for a long time.
The act of flossing stimulates blood flow to the gums, prevents bacteria from growing between the teeth, and removes food particles trapped between them. All of these actions work synergistically to help prevent bad breath.
It can help to improve overall health.
Plaque is a thin, sticky film that develops around, between, and along the gumline of your teeth. Plaque can be tough to detect, but it’s not something you want to let stay in your mouth too long.
Plaque bacteria can emit acids that eat away at your tooth enamel. If these acids are not removed through brushing and flossing, they might cause cavities over time. Additionally, plaque can solidify and form tartar, which gathers along the gumline. According to the ADA, this increases your risk of acquiring gum disease.
It reduces the risk of gum disease.
Gingivitis is the initial stage of periodontal disease. Inflammation around the gums is one of the early indicators of gingivitis. Additionally, your gums may bleed when brushing or flossing your teeth.
Gingivitis, if left untreated, can progress to a more severe infection called periodontitis. Your teeth may become loose due to a loss of bone support. Without treatment, periodontitis can lead to an inflammatory response in your entire body.
Regular toothbrushing and flossing can help reduce your risk of developing gum disease. Professional cleanings performed by your dentist every six months can also assist in maintaining healthy gums.
Related: How to Cut Braces Wires at Home
Needing an orthodontic appointment?
Needing an orthodontic appointment?
Visit Kumra Orthodontics Washington, DC or Kumra Orthodontics Stafford, VA, and request an appointment with us!
How to Properly Floss with braces
Using Floss Threader
You may speed up the traditional flossing process with a simple but necessary tool. A floss threader is a tiny, plastic gadget. A floss threader makes it simple to pull floss beneath the braces wire.
Using a floss threader will save you a lot of time and effort when brushing your teeth. Floss threaders can be found in the dental care section of supermarkets and pharmacies, as well as on the internet. Your orthodontist may also have trial threaders for you to use before buying a whole bag of threaders.
Step 1
You can use the floss threader’s eye to thread an 18- to 24-inch piece of waxed floss. Insert the needle’s point under the wire of your braces. Using a light touch, thread the floss through. The floss threader can be held in one hand.
Step 2
It would be best if you wrapped your index fingers around a strand of floss to help you better hold it. Use a gentle upward and downward motion with your floss to clean between your teeth. If you’re doing upper teeth, make an upside-down U shape: Once you’ve reached the gum line on one side of a tooth, switch to the other side.
Step 3
Remove the floss from between the teeth and behind the wire with care. Continue flossing the next set of teeth after restocking the floss threader.
Using Interdental Brushes
An interdental brush (IDB) is a small, mainly designed brush used to clean between teeth or brackets. Interdental brushes are used by people who don’t have braces to clean between their teeth. Orthodontic patients also use them to clean around and between their brackets and wires.
In addition to regular tooth brushing, using an interdental brush once a day can help keep your teeth and gums healthy during orthodontic treatment.
Interdental brushes come in various sizes, and you may need more than one to clean your teeth and braces properly. If you’re unsure, ask your orthodontist at your next appointment; they’ll be able to recommend the best interdental brush for your braces.
While wearing braces, wash your teeth and gums with an interdental brush once a day. Stand in front of a mirror to examine whether any stains are missed.
Using Water Flosser
Adding a water flosser to your routine will assist remove even more trapped debris and preventing plaque accumulation while wearing braces.
A Waterpik is a one-of-a-kind gadget that cleans between teeth and along the gumline with a continuous jet of water. A water flosser costs approximately $50, but certain types cost more. Due to the efficiency with which the stream of water cleans your mouth, flossing with this gadget takes only three to five minutes.
Certain brands of Waterpiks include orthodontic points. These tapered tips are more effective at cleaning around brackets and between teeth than regular tips.
Step 1
Fill the machine’s water reservoir with water. You may opt to add mouthwash to the water, providing an additional antimicrobial benefit.
Step 2
Insert the water flosser’s tapered tip. Test the flosser’s functionality and water pressure by pressing the button many times to see if it’s working properly.
Step 3
Place the flosser’s tip in your mouth while you lean over the sink. The water flosser is ready to use. As a precaution, close your mouth to prevent water from dripping out of it. While flossing, let the water run out of your mouth. Use a gentle stream of water to clean the gums and the spaces in between your teeth.
Step 4
Use a soft toothbrush to remove any food particles stuck between the brackets and the tooth. After that, administer the spray along the gum line and between the teeth. Each tooth should have this procedure repeated on the front and rear.
Step 5
Remove the water from the reservoir and dry the flosser tip when you’re done using it. Protect the tip by keeping it in a sealed container.
Find out about how to floss properly with braces with Kumra Orthodontics
If you have braces, you know how important it is to take care of your teeth and gums. Braces can make flossing a bit more difficult but with a few tips from Kumra Orthodontics, we hope that will change for the better.
Consult with a trusted orthodontic clinic today.